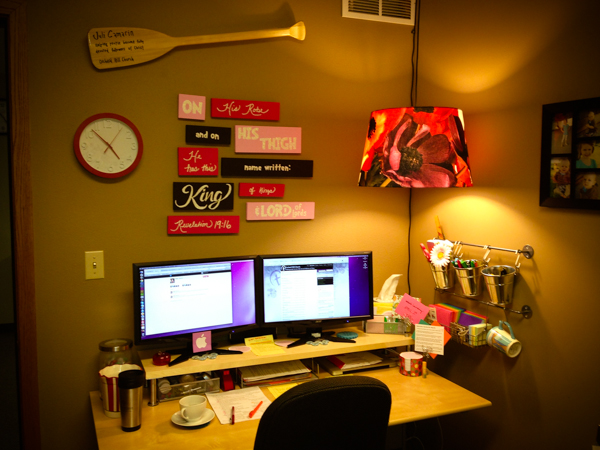
I recently switched jobs and my new office mate gave me carte blanche to add any design elements that I wanted to our mutual space. I wanted to add some color to our office and since I love hot pink, this was the natural choice... she keeps reassuring me that she likes the results even though I suspect that this much pink might have been a stretch for her.
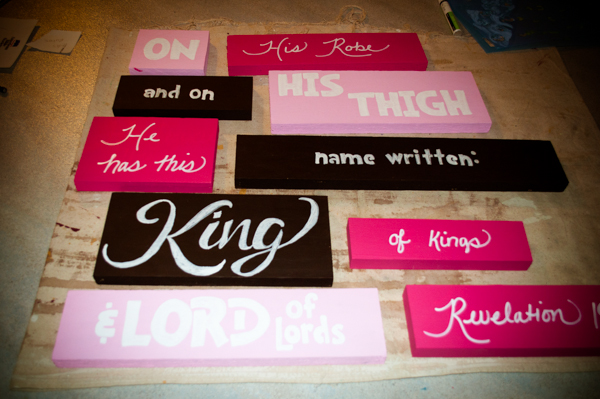
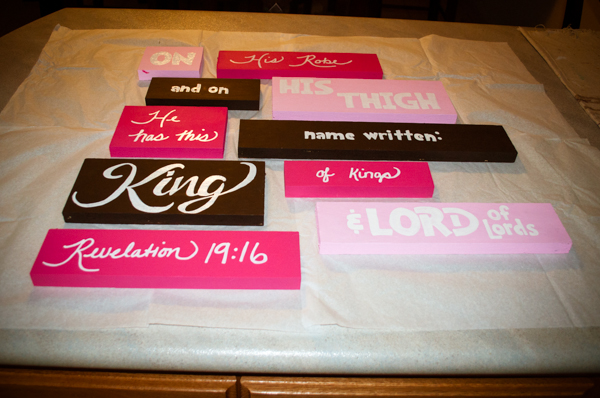
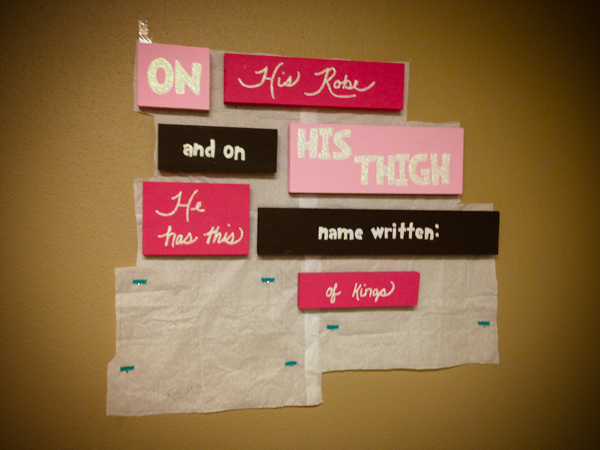
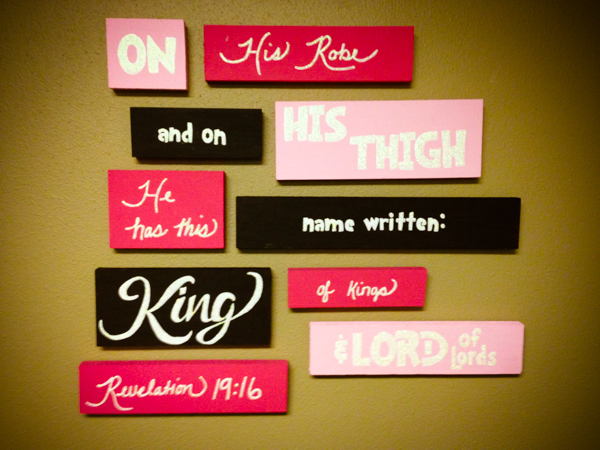
I also wanted to choose a verse for the sign to give me a great perspective and reminder during the day while working, so Revelation 19:16 made the top of my list very quickly! [ Read blog post about this verse ] I love how it turned out and I'm anxious to make another sign like this very soon... just have to find a place to put it!
What You'll Need:
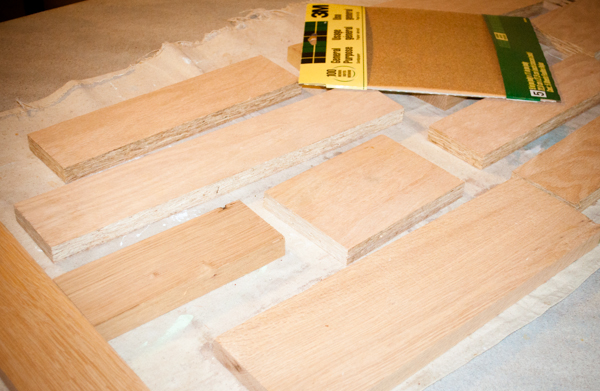
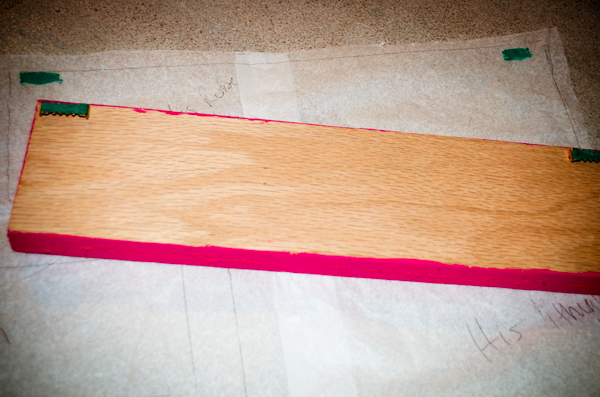
- Wood blocks
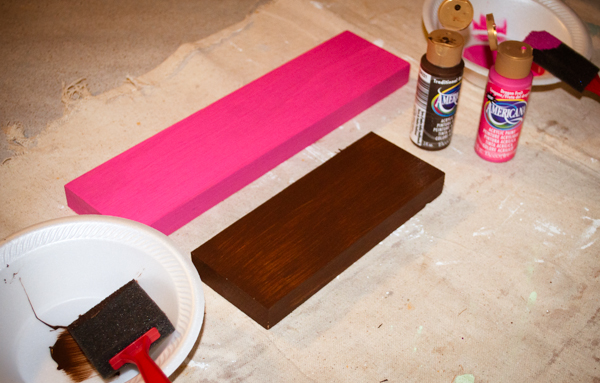
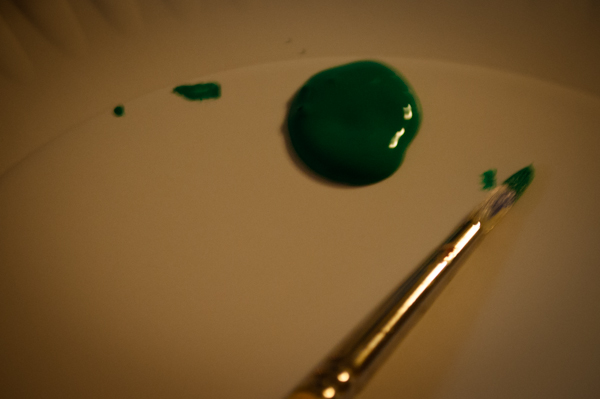
- Acrylic paint (a variety of colors as well as white for the lettering)
- Paint Markers (optional, however it makes doing the lettering a lot easier)
- Stencils - A variety of fonts will make the finished project interesting
- Glitter (optional)
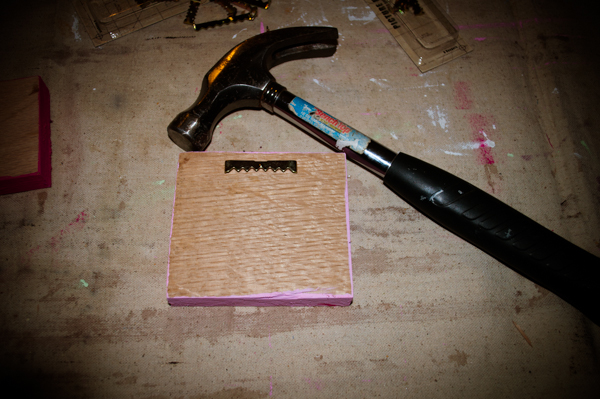
- Alligator wall hangers
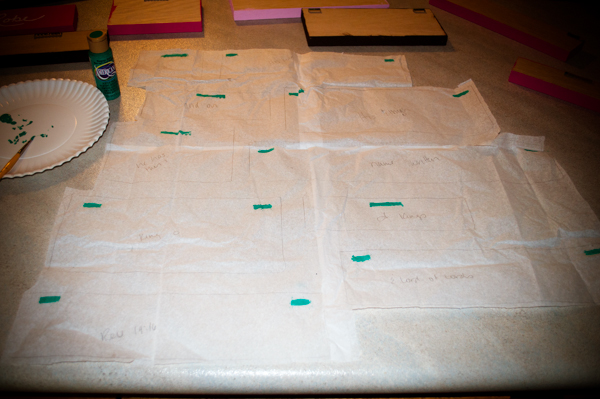
- Tissue paper
How To Do It:
- Choose various wood blocks of different shapes and sizes. My husband let me go through his scrap box and choose whatever I wanted... He rocks!
- Choose a verse or saying; remembering that less is probably more.
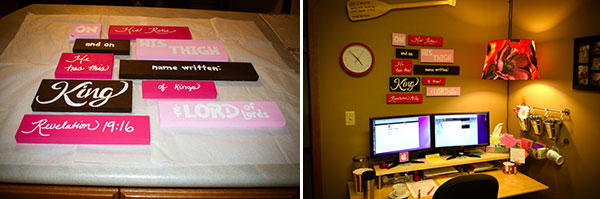
- Layout the blocks to find a pleasing layout.
- Divide up the words on scrap paper according to how you want them to be displayed on the wood. Lay them on top of the wood and rearrange until you find a combination that works. This took me a little while to get it right.
- Take a picture so you remember how it is laid out for the finish.
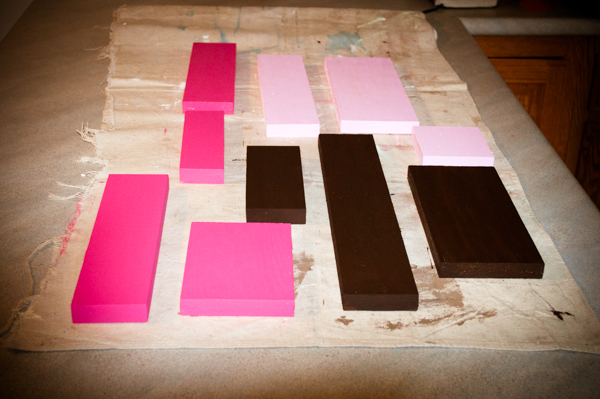
- Paint the wood blocks a combination of colors or shades. Be creative, really nothing is wrong! If you need color combination ideas, go to a paint supply store and look at their color swatch suggestions for color groupings.
- Using a vareity of stencils, handwriting or even freehand the words onto the blocks.
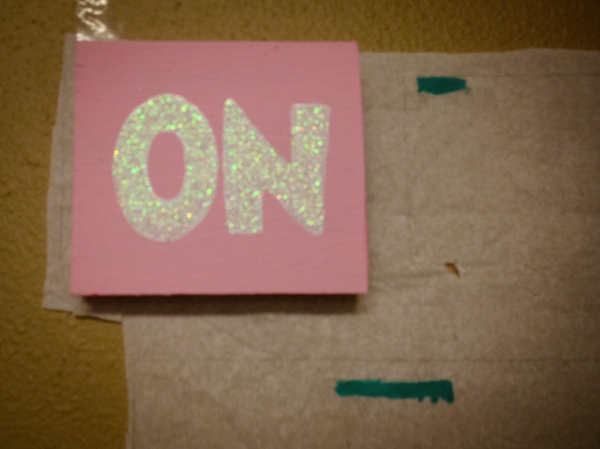
- Paint them using white paint. I personally use a paint marker for this because it is easier to get a finish with especially for lettering.
- Fill the lettering in with glitter. This of course is optional, it looks nice without it, I just really like using glitter in my finished projects!
- Layout the wood blocks on top of tissue paper and trace edges to help you hang on the wall as designed.
- Hammer in the alligator wall hangers onto the back of the wood.
- That's it! you are done! To easily hang, just tape the tissue paper to your wall and hang each block according to the pattern.
Below are pictures of the entire process!